Showing posts with label Hooking. Show all posts

Friday, January 12, 2024

Some Special Sparklers.

On New Year's Eve, our three grandkids were together, which is always a wondrous thing.  After dinner, to burn off a bit of steam, the kids were ushered outside, where there was a fire in the fire pit, and sparklers for twirling (with appropriate adult supervision).

Theo, our daughter-in-law took an amazing shot with the slow exposure on her camera and this was the result. 

I knew immediately that I would have to "hook" this moment. And today, I had a little time to see where this would take me. First of all, I wanted to get closer to the action, so I cropped it.

Much better to get in on those expressions. Jackson (10) already has swagger in his sparkler. Everleigh (6) seems very focused on watching what she is doing. And Charlie (2) is enjoying the wonder.

Next, I ran the image through my favourite Photo Editor - Photomania. And I decided the effect I liked best was "Brush Strokes".  Simpler sketch, stronger values, a much better hooking road map. Not much different from the original shot. 

And to create my sketch, I ran the Brush Strokes effect through "Coal Sketch", another effect on Photomania.


The initial result was just way too many lines in black and white, so I used the slider to reduce the effect, and let more of the photo show through, while still keeping a good strong line I can use for my pattern. I will trace the key lines onto a piece of tracing paper, and use that to transfer the pattern to backing.

This whole photo editing process is one of the technology tools I cover in my workshop, Creating Fibre Art in the Age of Technology.

My Workshop Week 2024 class filled in a couple of days after registration opened. My wait list turned into a second workshop in early March. And now I have another wait list for a third. It makes me so happy that folks are keen to learn about all of these tools waiting out there on the internet.


Sunday, November 12, 2023

Progress on Hooking for Joy

 Let me begin by saying how much I am enjoying hooking this.

After so many yarn and 4-cut projects, this is like stretching my arms and flying. Plus each little "swirl" is unique. And there is no "wrong" in this. So it is very freeing and joyful. Guess I am achieving my goal even though it is early days.

The idea was to have the spheres get lighter as I moved up the rug. So the bottom was very dark. Then came some medium dark. Then medium. And I am moving towards the medium light. Then the light. 


There are swirls on the other side of the centre panel as well. Smaller, but still quite a few. And the centre panel is just straight line hit-and-miss. I am popping in a few leftover strips as I go to hold the spot as the values need to change from dark to light in there as well. 

Once I get all the swirls done, I will have to figure out my background.I am leaning towards different values of grey in the negative space between. If I have a light, dark and medium, I can use whatever value I need next to each sphere. The lighter ones will need medium and dark next to them - the darker ones will need the light.

By the time I share my next progress post, I should have a little test of the grey background in a few places. It's nice to be able to move around and work on what brings me joy at each sitting.


Saturday, October 21, 2023

Older Mat. New Post.

For years now I have not only been using "free stuff" on my computer to help me hook from photographs, but I have also been teaching people about it. 

All my "hooking from photos" classes - live and virtual - use free online photo editors, but I also introduce my students to resources that are on the internet that they may not be aware of.

I have been invited to participate in Workshop Week 2024, which is an online extravaganza of teachers and courses. My course will be related to using your computer in rug hooking. And it will introduce those registered to the resources. 

I decided to do a blog post about my rug that I call "April Tech", which was a rug I created using my computer to do each and every step. A little background for the name and design. I had a "December" mat and thought it would be fun to create a mat for each month. As I was teaching this course in April, I chose April. (Those are still the only two month mats I have hooked. lol)

Step l: Clip Art (the perfect argument against "I can't draw".)

I thought that a kid carrying an umbrella in "April Showers" was a great place to start. I found the following clip art which was the foundation of the design. The main motif. There were lots of choices. Just google the image you are looking for with "Free Clip Art" and voila. 


I also wanted umbrellas for the corners. And I wanted some kind of cloud clip art.


Remember, these are all free!!! Royalty Free and Free to use. 


Step 2:  Fonts  (the perfect argument against "I can't print.")

I wanted a font that would be easy to hook, and that looked like April. I I went to dafont https://www.dafont.com/ and sampled a couple that I liked.


I blew them up to the size I needed and tried them on for size. 


I wanted to use a picture of my grandson, instead of the little girl under the umbrella, so I found a shot that I liked, cropped the image to get in closer, and put in his face.  


Step 3:  Enlarging

I used a free online resource called blockposters to blow up the image of Jackson's face inside the umbrella to the size I wanted. This resource works with your uploaded image in multiples of an 8.5 x 11" sheet of paper. So you can go two wide, three wide. It sends you a preview and gives you finished size dimensions. You can just tape the sheets together to make your final size. 

Then, on a piece of gridded paper, I put all the elements together. (This I did with scotch tape and scissors - I know it could be done on the computer, but old school seemed the best for me at this step.) 


With Jackson in position, the font selected, and the clip art umbrellas in the border, I was ready to go.
(Forgot to say that Jackson's photo was run through Photomania to create the value sketch I used for hooking him. )

A couple more decisions were made simpler with more online resources. I found an image online - not one to copy, but to do a colour selection from it for the rain on the inside - not the border. The colour plan was created by sampling the colours in the image using Paintbrush - a free program for Mac (it is called Paint for PC and does exactly the same thing.)

On to the hooking. There is no online resource for that lol. Just one loop at a time. Here is a progress shot - nearly done, but still a few things to change. You can see that already, I have used the same cloud swirl on all sides, instead of the raindrops I had originally thought of. 


Here is the final piece. 


I changed the single line around the main motif - opted for a rainbow of colour instead of the black and white beading. And I added a golden yellow outline to the lettering to make it pop. I hooked one line of the background wool around the black border, and then hooked a line of the golden yellow. 

It was a fun challenge to myself to prove that from start-to-finish, I could create an entire mat using the free resources that are readily available. I had used all of them together for many, many years. But not all in the same piece. 


Thursday, October 19, 2023

Two Firsts for the Kawartha Rug Hooking Group.

I have been hooking with this group since I moved to Peterborough. We meet in a local repurposed school that is now called "Activity Haven", and has more activities for seniors that you could ever imagine.

Before COVID, we had our own room and averaged between 12 and 22 people each Monday morning. It has always been a very welcoming group.

When COVID hit, we decided to see if Zoom would be a fit for us and began meeting online at the same time. Some weren't as comfortable with the online meetings, for a number of different reasons. But a core group galvanized in this format. And not only did we hook on Zoom, we solved one another's problems - and those of the world. lol.

Now we are back to in-person and occasional Zoom meetings when we feel the need. And we are back to something else. A sense of a group that can do things. And this month we have done two REALLY BIG things.

NORWOOD FALL FAIR

Early last spring, the OHCG was approached by the Norwood Fair committee to see if there would be any interest in having a rug display at the fair. Our group was contacted to see if we would be interested and we jumped at the opportunity. Rug Hooking had never been part of the fair, and we were taking the space from the Tole Painting/Decorative Painting folks.

To drum up interest, another member of the group and I did a demo night at the Norwood Library, bringing lots of rugs and demonstrating both Traditional and Punch Needle hooking. There were about 25 people present.

Dial forward to October 6 and we were ready to get this display started!! There was drop off and tagging on Thursday evening, judging and display on Friday, and pick up on Monday dinner time. The display looked great.  Neighbouring Campbellford group also entered pieces in this display. 

Apparently the feedback about having a Rug Hooking Display was very positive. And next year will be a breeze with the learning curve behind us. 


"ESTATE/STASH BUSTER SALE"

Over the past few years, many of our members have received calls from people who are no longer able to hook. Some are Estates, but some are also long-time hookers whose stash is a lifetime of supplies, which they are no longer able to use.

We decided to hold an event, in our usual Monday morning time slot, and see what the interest would be. People who were donating their supplies were given a free table. People who were selling were to pay a $25. table fee.

The group had unanimously decided to give any funds we collected to KAWARTHA FOOD SHARE. With the exception of one cutter and one frame, most of the proceeds were from "free, with a donation to Kawartha Food Share". We expected to raise a few hundred dollars, but we never dreamed that we would be able to take $992.00 to them on Monday afternoon. 

There was quite a bit of work involved, and a LOT of learning. But we are all eager to do it again next year, bigger and better.

We know that many of us have more patterns, more wool, more hoops and hooks than we can use. But as long as there are new hookers coming into the fold, or hookers who are looking to build stashed versus busting them, there will always be this way to raise fund for Food Share. 

Monday, August 28, 2023

Knitting and Hooking and Newfoundland Rug School and ...... COVID

 Yep, that's what's been going on since my last post.

I will save the COVID story for later, so you can enjoy the other parts of a great trip.

Rick and I went to Newfoundland on August 9, picked up a car in Gander and immediately drove to St. John's. It is apparently the only way you can rent a car - one big loop, no pick up here and drop off there.

We spent 3 days in St. John's - not the best weather days, but perfect for a Hop On Hop Off Bus Tour, and a few destinations on day two.  Here is the first photo of us on the bus tour day - pissing rain and absolutely socked in with fog.  I think I took this selfie at Cape Spear, but in all the fog, it was hard to tell. ha ha 

This was the second day, and this shot was taken by another bus passenger at Quidi Vidi. Quaint little harbour that was on our list, but it wasn't open at 10:00 in the morning, so we settled for this shot and then purchased some of their Iceberg beer at a liquor store in Mount Pearl. 

We have three of our best meals ever in St. John's. Exquisite fish - all three times - two dinners in the Terre Restaurant attached to the Alt. And the third meal at Portage, right across Water Street from the Alt. We found all the people who we met to be incredibly friendly and professional.

The next three days we went to Lisa Meecham's Airbnb "Salty by the Sea".  What a change from busy St. John's. This place was idyllic - and not often I use that word. I can't say enough good things about this place. Right across the road from Upper Island Cove, which offers a spectacular view all all hours. Lisa has filled her place with treasures that are waiting for you around every corner. We had three days of blissful peace. I know there are lots of pics on the link above, but they don't have my very relaxed husband watching the water from a red Muskoka chair. 


Then we drove back to Gander to return the car and send Rick back to Toronto before I went to rug school. I stayed behind for 5 days, and had fun just about every minute of all 5.

Rug school this year was a bit smaller than when I was there before, but it was a fun group and everyone got to know lots of people. We had a games night on Friday night, and a Kitchen Party on Saturday night, complete with a "screech in" - and a cod! Luckily, I was screeched in many years ago in Toronto, so did not repeat the process.

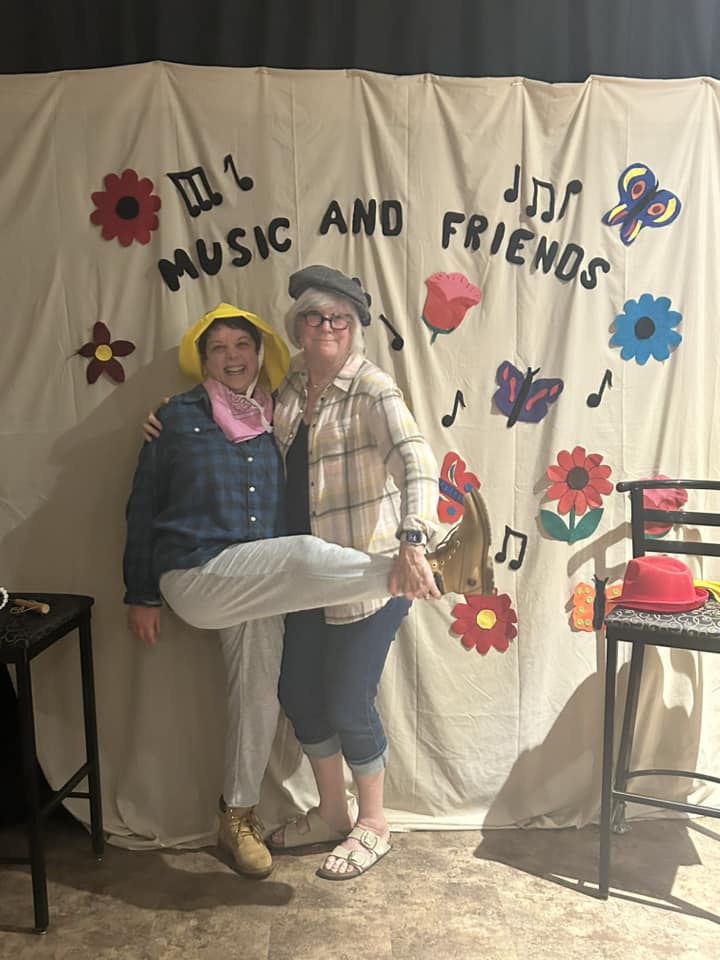
This was my first Kitchen Party, and there were some shenanigans!! This is a student from my class, and a silly pose in front of the backdrop with the theme, Music and Friends. 

Speaking of the theme, I hooked a ridiculously fun project for the Theme Challenge. After letting Friends and Music percolate in my head for a while, I decided to hook a very large LP, with a song title or two - about friends -  in every groove. I even put it on my yarn swift so you could spin it. AND I made a play list of the songs. I didn't win, but it didn't matter, it was a lot of fun and is a great keepsake.


My class had 14 keen students, who were working on portraits from images that had been run through various photo editors. I had three cats, two dogs, several grand children and self portraits. At the end of three full days, a couple of people were finished, and many were well on their way. Everyone has promised to send finished pieces, so I will hopefully be able to share here.

As to the knitting part, I did take a sock with me for plane rides etc., and didn't really get too far. I find socks are the perfect carry-long project, but tend to opt for a movie on a plane if there is one. Luckily there is no deadline for socks - at least not for a while.

So, now to the COVID story. By Saturday night, when I spoke with Rick from school, he was feeling horrible. I thought it was another "man cold", that he had picked up from the driver who brought him home on Wednesday. We decided to test him as soon as I got home on Monday. "POSITIVE". The first of many tests. We will do another one today, since he is now more than a week. And we want to see the grandkids. I have had 4 "negative" tests, and my just laying low until Wednesday, which will be nearly 10 days.

All in all, an amazing experience - except the COVID part. But after all the frenzy of activity, it's nice to be a bit bored and sitting around the house waiting for freedom to come back.

Be careful out there. It's still here, even though nobody wants to talk about it.


Friday, October 7, 2022

More gardens to share.

 So, I finished my fourth sample garden, the one that was inspired by the home spun yarn that is dangling from the bottom. It is mounted on a stretched canvas that is 10 x 20. The centres of the flowers are also created by making quillies from the "rasta" yarn. (This is not the best picture of it. Colours are much brighter.)


In addition to the gorgeous hand spun yarn, in the little "prickly" looking flowers in the upper left corner, I used the yarn that is made for knitting "scrubbies" for the kitchen. I love how it turned out. If you zoom in a bit, you can see it clearly.

Then off me and my little gardens went, to my first "in person" workshop since 2019. What a rush that was!! Everyone was soooo happy to be together in a real space, of course they were going to have a good time.

But they got the concept, and after I showed some reference from Pinterest, and did a lesson on making a quillie and how and what to do with Proddy, off they went!!!

Each student had something unique in their heads as they started their little gardens. I took a few early shots while in the class as they were just getting started. 


By the end of the day, everyone was much further along. And I am thrilled to see how many "gardeners" have been sharing their masterpieces on Social Media. 

Here is Peggy's 


Here is Claire's 


And here is a link to Martina's on her Instagram page. (you can't copy an image from there). You will get a re-direct notice, but if you click on the link you will see it. She actually was working on 4 tiny gardens, so you will see more from her either on IG or here. 

https://www.instagram.com/p/CjT-NW7pxS0/

Hopefully, I will have more to share in the coming weeks. 


Friday, September 23, 2022

The perfect garden for a black thumb!!!

I have never been what I would call a "gardener". At best, I have been able to keep the hardiest plants alive inside. And have successfully chosen plants for, and looked after, two perennial gardens outside. I listen to others talking about their LOVE of gardening, and that is not the word I would choose. That said, I am a "wicked" weeder and trimmer, which has come in handy over the decades.

I am happy to announce that I have found my perfect kind of garden. It suits my trimming and weeding skills, and it cannot be killed.

SURPRISE! It is made from wool. I have created 4 gardens in anticipation of a workshop I will be teaching in Cobourg next Thursday, the 29th. First time for me. First time for this class of brave hookers.

A bit of a back story needed here. Several years ago, our Ontario Hooking Craft Guild Annual was held in North Bay at Nipissing University. Adjacent to the big room where the rug show and vendors were located (I think we were on top of the covered skating rink in the athletic centre) was an anti-room that contained a "living wall". It was the first one I had ever seen and I was in awe. 


Although I don't remember it exactly like this, I found this picture on the university's facebook page and it is in the athletic centre, so I guess this is it. 

Recently, these "vertical gardens" are popping up EVERYWHERE. Many office buildings are using them - as respites from work, as dividers, whatever. And if you go online you can order materials to make your own - even DIY instructions to make moss ones - even artificial ones.

A while ago, I decided why not see if I could make a small garden out of wool. I would use not-so-traditional techniques like "quillies" and "proddy" and make up the rest as I went along.

Here is the first result of my exploration. It is nestled inside a shadow box that I think is 10" x 10". 


I quickly realized that you could shape just about any kind of leaf - like ferns - just by cutting into the wool. And your imagination would let you create flowers that would never exist in nature.

About the same time, Pinterest was blowing up with "vertical garden" reference. I started collecting all the different things I fell in love with. It's amazing what materials are being incorporated into some of the recent ones, like twigs and other kinds of wood. Some are even planted inside driftwood. They are amazing. And, like all art, these walls are following basic art rules with respect to design, colour and texture. Eureka!!

On to the next one, which is a sweet little 4" x 6" mini, inspired by a "mossy" one I found on Pinterest.  Here is the inspiration garden


And here is my inspired "tiny garden" in a special little hanging frame. Look closely and you will see quillies and French Knots, some high loops cut in a fringe, and some novelty yarn that has been kicking around in my stash forever. 


Talk about addictive. There are just so many incredible images of the real McCoy, that my faux collection was bound to keep growing - pun intended.

Number three was also inspired by a Pinterest image. This wall that features a collection of little live gardens made me realize that I could make an arrangement of my wooly wonders. And I happened to have an oval frame that I found on sale, and I was eager to try some new effects.  Here's the image


And here is where I netted out on my oval garden.


This time, my proddy flowers included some green Sari Silk, which gives a different look and feel when combined with green wool.  A couple more quillies and some French Knots, wool trimmed to look like dangly ferns and directional hooking gave this lots of contrast and texture. But the real fun in this exercise was the grey and white "marled" yarn which I pulled high and trimmed to see if I could create an effect similar to the feather plants in the "inspiration" garden. Then I diluted some glue and painted it to see if I could shape the yarn and make it stand up. (A little manipulation goes a long way!) 

I am just finishing my fourth sample, which I will share when it is framed. It was inspired by a hand spun yarn I bought at least a decade ago. Bright colours, lots of fibres spun together to create knots in the skein that are just beautiful. I knew I would use it as a dangler at the bottom. And the colour in this hand spun would inspire some colour inside the garden. Luckily, the more Pinterest images I saw, the less I was afraid to put some colour bursts into this one.

The garden is done, but when I went to put it on my stretched canvas, I realized I needed to add another row - or two - of regular hooking all the way around.

You will just have to come back to see it.


Thursday, August 4, 2022

The NANA BLANKET is done.

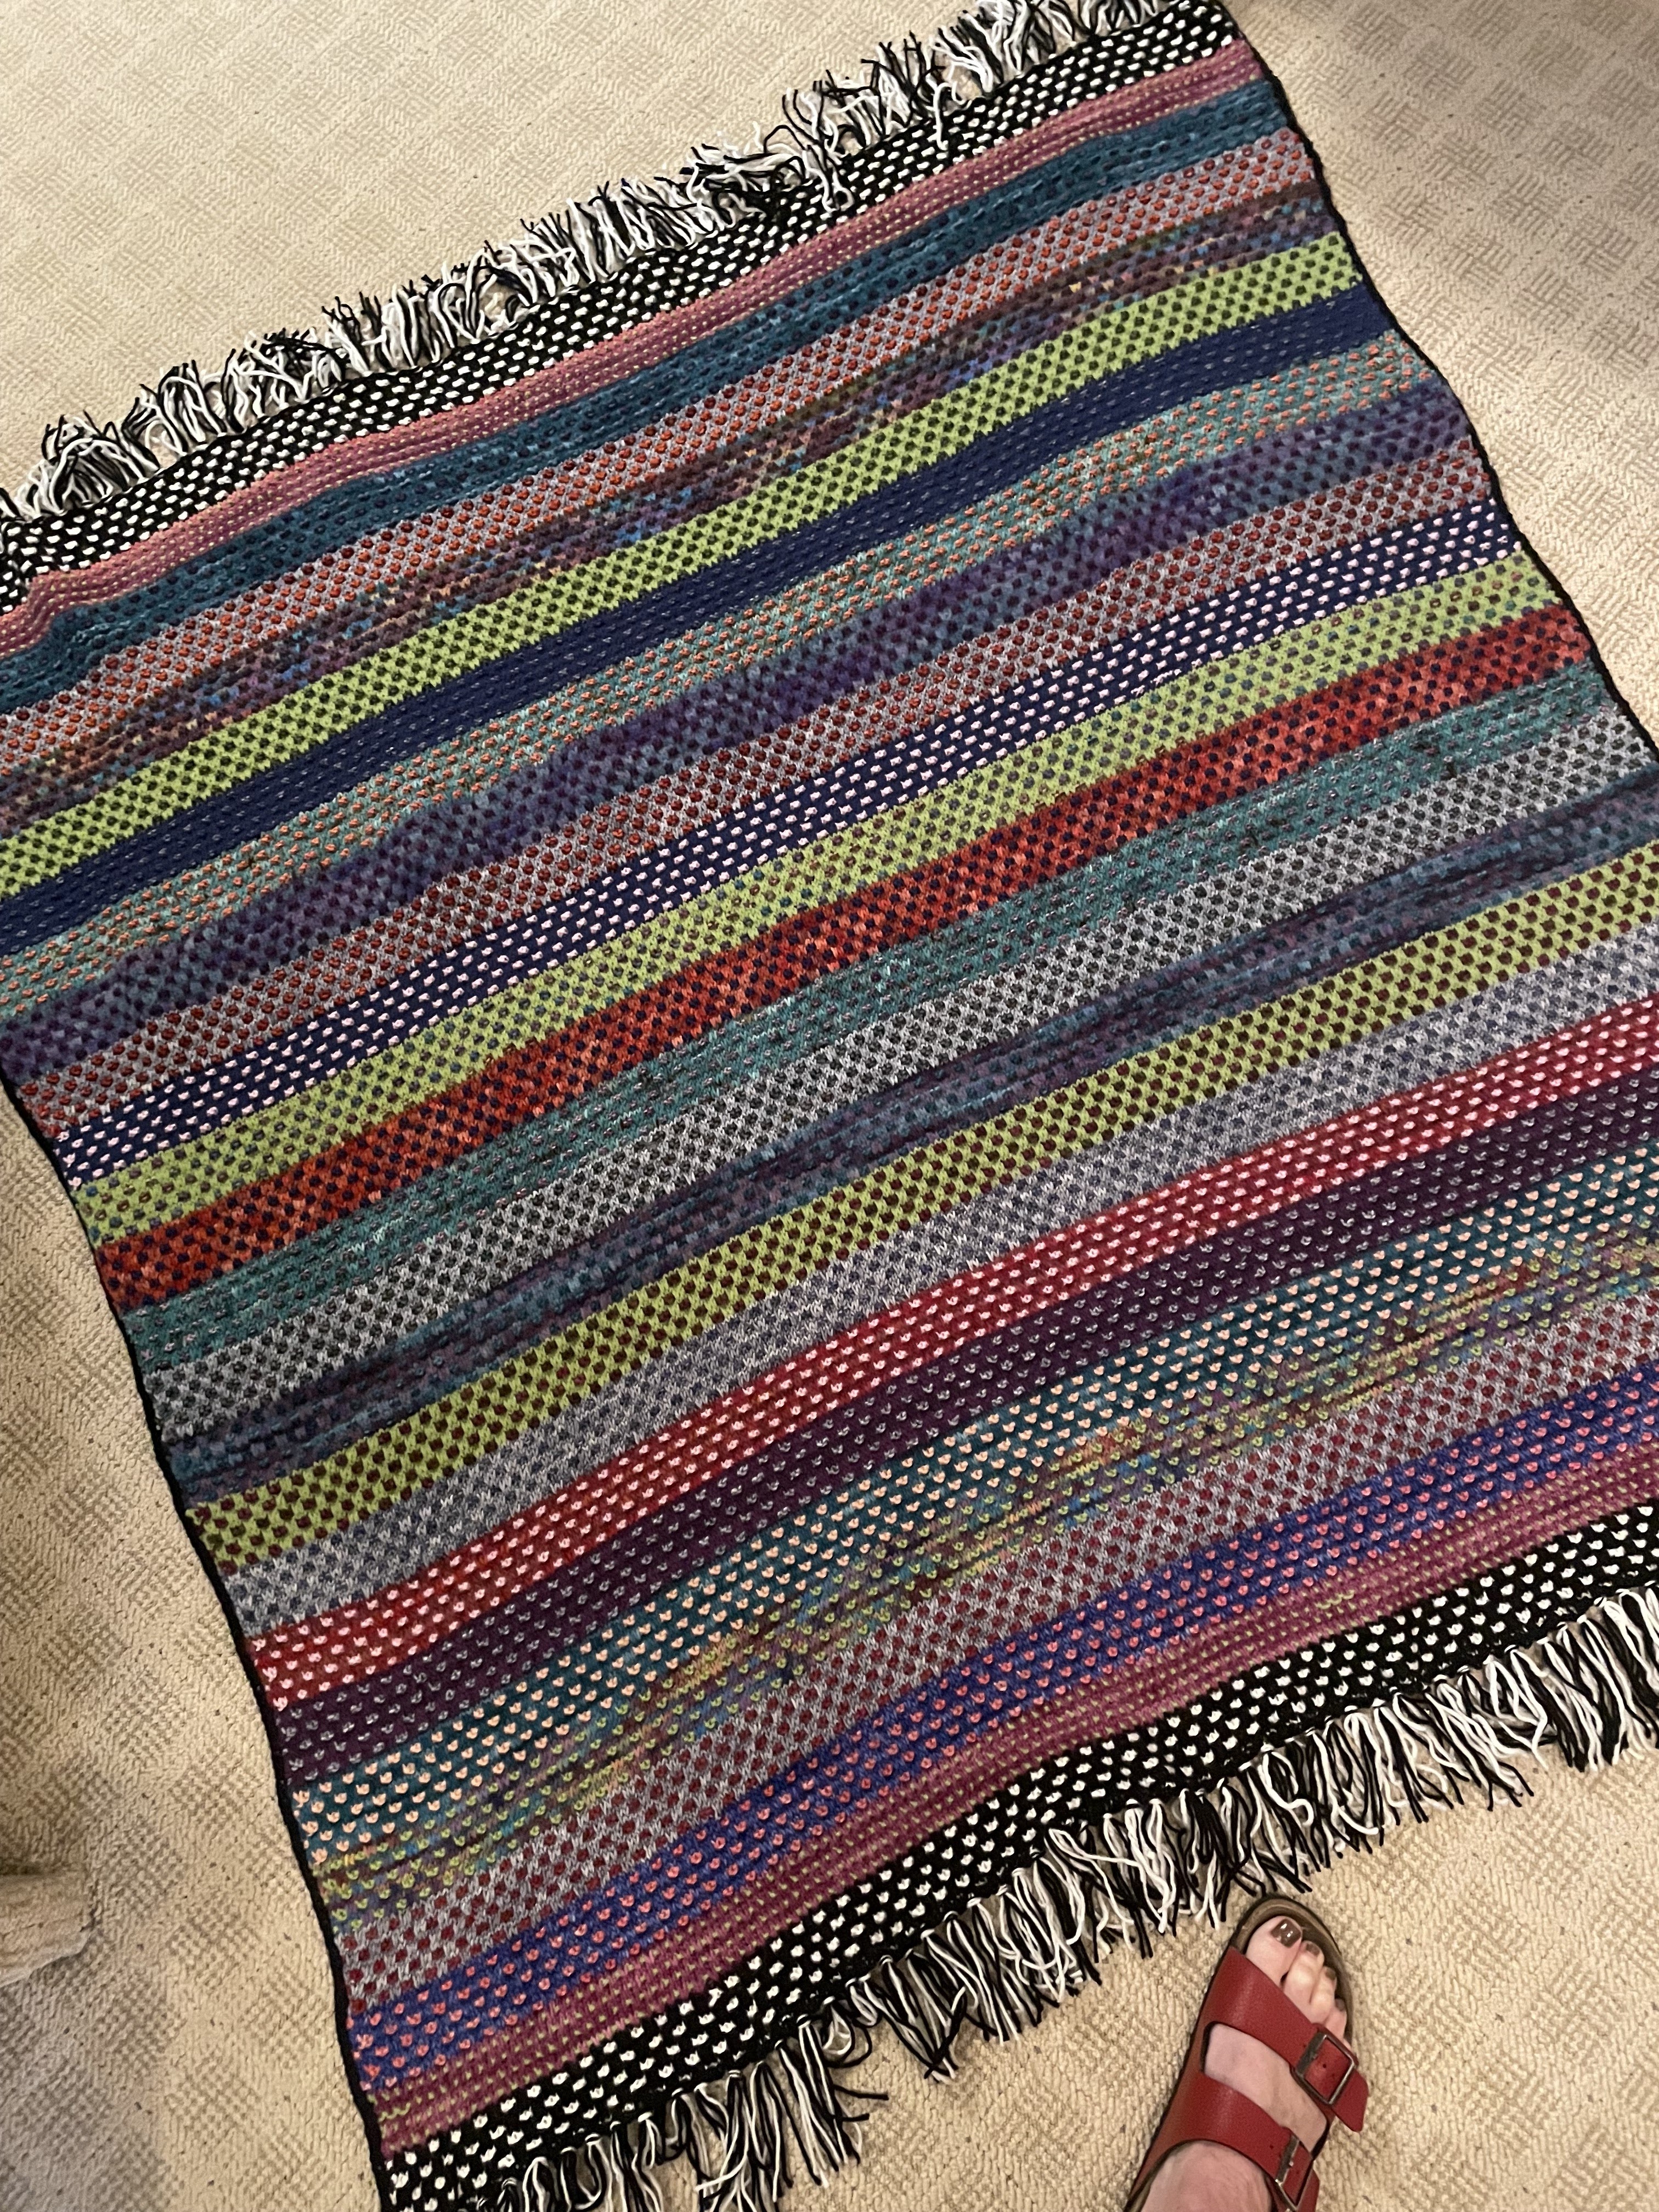
Yup. It is off the needles, knitting done, fringe added to ends, i-cord finish on the sides and steam blocked. (I couldn't even imagine wet blocking this beauty.) Here it is sitting on the love seat in the living room, while the steam blocking cools. 

If you have been following these last few posts, I really didn't have much of a plan for this labour-of-love. Just knew I would only use my sister Nancy's yarn, and let it lead the way.

I did know when I did the first black and white band that the last band would be the same and there would be black and white fringe on those ends. And as I ran out of some colours, I introduced something similar from her "stash", without once dipping into my own. Actually, that's a bit of a fib, because her white ran out before I finished the fringe on the second end, so a did dip a tiny bit.

Of everything I have ever knit, this has to have been the most special. Because it was all yarn from her stash - DK and heavier. Because it was for her grandson. And because I got to be with her every stitch of the way. (This project may be done, but she sure left me enough started projects and sock weight yarn for many more.)

The final size of this blanket is about 54" wide, by 60" long plus the fringe (which is 4"). I could have kept going, but the stash was really getting low on colours, so I let it tell me when to stop. Pretty sure it's the perfect size for snuggling and thinking of Nana.

Not sure what project to move into next. But I will keep you posted when I decide.

On the hooking front, I finished "Bums in the Window" and gifted it this past weekend. Since it was a favourite photo, it was very well received. These little 8 x 10 moments are so wonderful to do. And I never run out of them. 

Also, since my last post, I did a stone carving workshop, in the Zimbabwean style. It was an incredible experience to go from this rock on Saturday morning...


to this Warrior Princess on Sunday afternoon.  I originally thought I was carving an angel, but when she got heated and waxed, the beautiful veins in the rock decided what she really was. Many thanks to ZimArt and in particular our teacher Tapiwa Mapurwanga, who was there when needed to bring the angel out of the rock. 


Where have I been?

Wow, I cannot believe it has been so long since my last post. So long, in fact, that I turned 75 during the break. How can that be????? To c...